So, I'm sort of a late night crafter most of the time because I have three kids three and under and they are BUSY!! Which means I either have to herd them into a corner of my craft room with a project and hope they don't get paint all over whatever I'm working on or I can wait until they are snuggled into their beds and stay up until one in the morning crafting and lets face it, I'm a night owl! So, this was what I created last night, and you will not believe what I used to make it!
Looking familiar? A couple weeks ago I picked up this lamp shade for $1.50 at a thrift store because unlike some lamps it had the whole metal skelleton underneath (many of them will simply have the top and bottom ring and a very stiff material for the shade portion). Anyways, I was planning on tearing off the fabric, adding some twinkle lights and birds and whatever else sounded good to make my daughter a night light for her room. Well before I started I looked at all that perfect pleating and thought to myself, what a waste! So what did I do? I saved it!
So I started deconstruction, the inside went first so I could get a good look at the understructure and see if the fabric had been glued down to the center posts (that's what I'm calling them, if any of you know what they're called, good for you!). It wasn't, the fabric they used was also some kind of polyester, cotton mix which made me think that this would work. If it didn't pass the laundry test I figured it would be an interesting experiment at the very least.
I pulled it all off the rest of the way and discarded the frame until the next project.
After trimming the glued portion at the bottom I had quite a bit less fabric than I anticipated, so I made the executive decision to use some leftover fabric from another project to add to the bottom. I also needed to fix the top, it was also covered in glue.
To fix the top I ran a quick base stitch under the glue line to keep the pleats in place.
I trimmed the excess off the top, just be careful not to cut through your base stitch or you will be pinning everything like crazy. Have I mentioned that I hate pinning? Almost as much as ironing! I know, I know, all of you seamstresses are cringing right now...you'll get over it though.
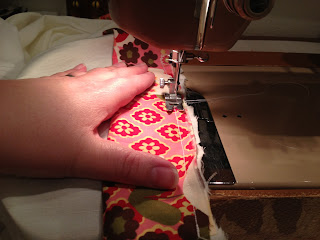
I cut a four inch strip of fabric to extend the bottom, folded it in half and sewed it to the bottom of the pleated portion of the skirt.
After getting halfway through prepping the pleated fabric I decided it was way too thin to not have a liner, so I went ahead and used the liner from the lamp and used the pleated fabric as a pattern. Normally when I'm making a dress or a blouse or something that involves some kind of under collar with interfacing and a ton of extra little pieces that have to be sewn together that are more complicated than the main part of the garment, I will normally just turn it into a reversible garment. After you have done a few it gets easier, plus it's like two outfits in one. I'm also obsessed with enclosed seams, but more on that later. Anyways, in the picture above I have placed both fabric pieces right sides together, most people might pin at this point....but we know how I feel about pinning. Go ahead and sew the pieces together at the top where the waist will be.
I found this headband in the dollar section at Target a few years ago and bought it for my daughter, thinking it was much smaller than it was. It never fit her, so I tried it on her a few weeks ago and realized that it was about the right size for a waistband. Perfect!
I pinned the headband to the top of the skirt and stretched the knit fabric while I sewed it to the cotton fabric.
It wasn't quite stretchy enough at the top so I ran a little bit of elastic through the top, using the hem as a casing. Normally I would run elastic through a casing with a safety pin, but the casing was too small so I used an upholstry needle I had lying around.
So, in conclusion to this project, I would not normally suggest using the fabric from a lamp shade for a washable garment, who knows how it will hold up in the washer and dryer, I mainly did this because I was bored and I thought it might work. The headband I would do again in a heartbeat, I think it adds a really fun detail, and in the future I will definately think twice before mixing such a vibrant red with a white fabric, colors tend to want to spread when the conditions are just right. If they do and this ends up an epic fail I will be sure to tell you about it. So, I hope you enjoyed the tutorial, keep your thinking hats on when you have a pile of would-be junk that you are thinking about getting rid of and happy crafting!!!


I also have an upcycle obsession! It's kind of out of control. I can't hardly throw anything away. My house is filling up with random tidbits of [whatever] because as I go to throw it away, I imagine that it will be great for something and then stash it.
ReplyDeleteFun skirt!
~Jaimie (Sorry, I post as Milly... weird, I know. It's my second self.)